Compare Cleaning Costs and Methods for the Exterior on Your Home

exterior house cleaning with pressure washerLet’s talk about cleaning cost and techniques for today’s top siding products:

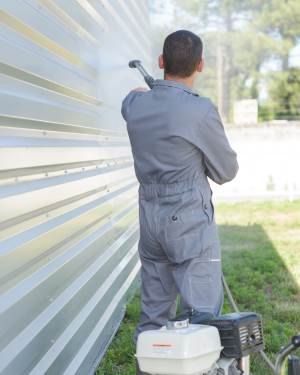
Pressure Washing: The Basic Siding Cleaning Method

Siding cleaning methods are more alike than different. A pressure washer can be used on all types of siding. What differs is the precautions that need to be taken for each material.

Cleaning siding with a pressure washer has three steps:

  1. Using gentle pressure, the siding is sprayed with a mild detergent and water solution that is given at least 10 minutes to loosen dirt
  2. Areas of heavy soil such as mold and algae are gently scrubbed with a brush with soft bristles
  3. The siding is rinsed from the bottom to the top and quickly down again with the pressure washer set to a pressure level appropriate for the material being cleaned

The detergent solution should not be allowed to dry before it is rinsed, so only one side of the home should be wet before rinsing. Since direct sunlight will quickly dry the cleaning solution, the workflow should be arranged to avoid it. When this isn’t possible, a sunny side of the house should be cleaned in sections 15-30 feet wide to prevent drying.

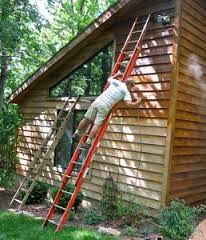
General Tips for Pressure Washing Preparation

As the name implies, significant water pressure is used in the process. Prepare your home for pressure washing with these tips that apply to all types of siding:

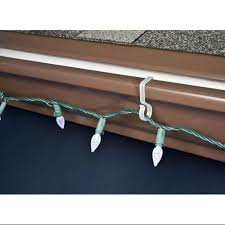
  • Remove all non-permanent decorations, like Christmas or holiday decorations.
  • Inspect and replace loose or missing caulk around windows, doors, vents and other openings at least one week before cleaning to allow the caulk to cure
  • If you have wood or cedar siding, make sure you seal all holes and cracks to prevent water leaking into walls.
  • Clean then repair loose gutters and downspouts to keep them from coming apart during cleaning and damaging the siding
  • Cover outlets with duct tape that don’t have weather covers on them
  • Optionally, cover light fixtures with a plastic bag, and tie or tape the bag closed to keep it secure
  • If your home’s foundation leaks, have it repaired prior to cleaning
  • Close and lock all windows during cleaning to create the tightest seal

Tips for Cleaning Each Siding Type

These siding cleaning tips apply to specific siding materials.

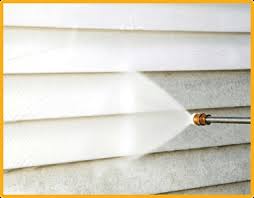
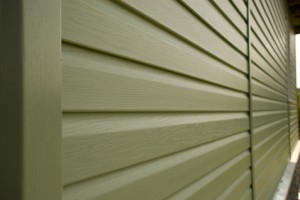
Vinyl and aluminum siding cleaning: Horizontal siding should be pressure washed side to side; vertical siding such as board & batten siding should be washed up and down. For either, the essential precaution is not to force water into the seams of the siding where it can cause mold or warp the home’s sheathing.

Brick, brick veneer, stone and slate: Inspect and replace missing or loose mortar around brick or stone at least a week prior to cleaning to give the mortar time to cure. Also, make sure weep holes aren’t clogged, so that any water that gets behind veneer will be able to drain properly rather than becoming trapped against the home’s sheathing where it will cause mold and warping.

All wood siding: Check and repair wood siding, shingles and shakes for missing or damaged material, and replace it before the siding is cleaned. Replace cracked sections or repair the crack with quality wood filler and allow it to dry. Never use a brush with stiff or wire bristles on wood. If you have any concerns, use the minimum pressure, typically 1,200 to 1,500 PSI, needed to remove the detergent solution or rinse with a garden hose. If you have reason to believe your wood siding is fragile, do not pressure wash it. Instead, use a soft brush to wash it with a mild soap solution, and rinse it with the garden hose with the sprayer you use to water the garden or wash your car.

Painted wood siding: The US outlawed lead paint in 1978. If you suspect that your wood siding predates 1978, it might have layers of lead paint below the surface. Use minimal pressure to remove only the loose, top layer of paint. If several layers of paint are flaking off, contact professionals for advice and cleaning.

Exterior Home Maintenance for Fall Season

man-on-ladderWhen there’s a slight chill in the air and leaves begin to fall, this is a reminder to home owners that winter is just around the corner. Fall is the best time to create a checklist for exterior home maintenance. Creating a checklist shouldn’t be hurried or important details might be skipped.

For a little help getting started, begin with the top “must do” tasks.These will get the most important fall home maintenance tasks out of the way, and you’ll likely spot a few other areas that need work as you go along.

Fall Home Maintenance includes:

  • A thorough inspection of the exterior roofing, gutters and siding
  • Checking for possible gaps around window and door frames
  • Cleaning debris from gutters
  • Sealing around the bases of chimneys and other exhaust outlets
  • Checking downspouts for buildup of debris
  • Pressure washing of exterior siding
  • Checking the condition of exterior paint
  • Replacing wood fascia that shows signs of fissure cracks or rot
  • Inspect foundation for cracks or soil erosion
  • Pressure wash decks
  • Secure loose exterior siding

“Must Do” Task No. 1 – A Thorough Inspection
In order to evaluate the amount of preparation for winter needed, the first task for homeowners is a comprehensive assessment of the condition of the home and structure. The simplest way to do this is to create an inspection checklist that covers the condition of foundation, exterior siding, gutters and downspouts, wood fascia, doors and windows, chimneys and exhaust outlets. In older homes, note whether tasks require repair or replacement.

Task No. 2 – Preventing Loss of Home Heating
Energy costs can be prohibitive during severely cold winters. To prevent loss of home heating, it’s necessary to check for exterior gaps around door and window frames. These often occur due to normal weathering. However, left unnoticed, they can increase the cost of energy.

Task No. 3 – Cleaning Debris from Gutters
When gutters become clogged with debris like fallen leaves or bits of dust, wet fall weather may cause the gutters to collect water. When this happens, elevated levels of water in gutters tend to seep under the eaves of the roof and cause interior damage. Even with today’s new gutter caps, a certain amount of trace dust can build up, depending on the severity of wind and ice.

Task No. 4 – Seal around the Base of Chimneys and Exhaust Outlets
Another way that energy may be lost is when the sealant around chimneys and exhaust outlets becomes worn, reducing the integrity of roofing materials. Special sealants can be applied to restore around the base of a chimney or exhaust outlet.

Task No. 5 – Checking Downspouts for Buildup of Debris
After cleaning gutters, downspouts attached to gutters should also be inspected for a collection of debris. Very often, downspouts collect debris that doesn’t always pass to the bottom outlet. Use a pressure washer to push out any collected debris in downspouts.

Task No. 6 – Pressure Wash Exterior Siding
Though it may go unnoticed in the heat and humidity of summer, exterior siding does show signs of residue buildup. This is especially true if there are foundation plants and shrubs or large trees in proximity to the house. Green residue builds up and makes the exterior siding appear unsightly. Pressure wash exterior siding to keep it looking fresh and vibrant.

Task No. 7 – Check Condition of Exterior Paint
For homes with cedar, wood or fiberboard siding, the task at hand is to check the condition of painted surfaces for chips and peeling. A new coat of paint may be needed or a sealant should be applied where applicable.

Task No. 8 – Replace Rotted Wood Fascia
One of the most overlooked tasks for fall is to inspect the wood fascia to which gutters are attached. Weather often plays havoc with this wood and the weight of gutters attached make the load on the wood doubly comprised. Wood fascia may show signs of fissure cracks or rot above or below the gutter line. Before the situation worsens, replace the wood fascia to avoid gutters detaching under the weight of heavy ice and snow.

Task No. 9 – Inspect Foundation for Cracks or Soil Erosion
To properly maintain the exterior of a home during the fall season, it’s important to inspect the foundation of the home up to the level where siding ends and foundation begins. Soil, especially in certain types of sandy soil, tends to shift slightly with each year. Foundation cracks may begin as tiny spider-like veins. As soil continues to shift, however, those tiny cracks can open wider and become a major problem. Check every fall for these and use a special cement sealant, applied with a single blade trowel.

Task No. 10 – Pressure Wash Decks
After a thorough inspection and maintenance of the exterior of the home is completed, there’s just another task that shouldn’t be overlooked: the outdoor deck. Start by inspecting around the base of the deck. Look for unusually worn wood or other signs of deterioration. Sand smooth any rough spots on the deck and deck stairs. Apply a weatherproof sealant for added protection.

Task No. 11 – Secure Loose Siding
If siding doesn’t require painting or pressure washing, check for areas that appear to have loose shingles or shakes. Should a serious late autumn or early wind storm occur, loose siding can detach and be damaged.

With just a little pre-planning and a few minor repairs and replacements, homeowners can feel cozy and warm throughout the long, cold days of winter.

Cedar and Wood Siding | How to Reseal Your Siding


Cedar Siding ResealingFew siding materials compare with the rustic beauty of natural wood. However, wood is extremely vulnerable to the elements and must be properly sealed to protect it from mold and rot. In this article, we will take you through a step-by-step process of resealing wood siding.

Terms

Before undertaking this project, you need to know which products to use as well as the properties of your wood siding.

  • Sealer: Is a clear substance applied on top of the wood siding that does not change the color of the wood. This product is designed to shield the wood from water damage. Sealers with UV inhibitors can also help protect it from sunlight. Look for a resin-based product when resealing wood siding.
  • Stain: This product penetrates deeply into the wood and changes its color.
  • Softwood siding: Pine, fir, and spruce are commonly used for siding because they are relatively inexpensive wood options. However, they are also the most susceptible to damage and require more frequent sealing. You can read more about each of the wood types at Bob Vilas house.
  • Cedar siding: A rot-resistant alternative to softwood siding. Cedar Siding is straight, resists splitting, and is less prone to insect damage than its softwood counterparts.

Preparing your yard

Before you begin to work on your siding, you need to prepare your yard so that nothing gets damaged by flying debris, stain splatters, or cleaning chemicals. Cover outdoor appliances, patio furniture, and plants with canvas drop cloths. You may want to trim branches that are touching the house or tie a cord around them and pull them out of the way. This will keep them from becoming a nuisance as you work on the house.

Preparing the siding

The siding must be thoroughly cleaned and old layers of paint or sealer must be removed before you can apply a new coat.

  • Begin by sweeping off dust and cobwebs.
  • Inspect the siding for rot or damage.
  • Have any damaged pieces replaced.
  • If necessary, use a paint removing product to remove an old layer of paint.
  • Hose down or pressure-wash the exterior of your home.

Applying the sealer

Make sure the siding is completely dry before applying the sealer. If you are staining the wood, stain it first and then apply the sealer. Go slowly and make sure the sealer seeps into every crevice. If the manufacturer recommends two coats, wait for the first to dry thoroughly before applying the second.

Do It Yourself Cost

Before you grab your old tarp and paint brush from the garage you may want to consider some of the cost involved in this project. Many of do not have all the proper tools for a restaining job so there will be a few hidden expenses as well as the obvious ones. The stain or sealer is the first that should be on your list. This product can run between $30 to $50 dollars per gallon. To help you decide how much product you might need here is a general rule of thumb. Smooth finished wood you can expect 250 to 350 sq. ft. (23 to 33 sq. m.) of coverage per gallon of stain. For rough cut cedar you can expect about 100 to 200 sq. ft. (30 to 60 sq. m.) per gallon. Now the price per gallon will change with the brand, the color, and the quantity you need to purchase. The less thought of costs may include:

  • $150.00- Tarps for covering all your bushes,plants and grass around the base of your home
  • $200.00- power washer and big ladder rental. Even though these items are not a must for this project they will make the job easier and safer
  • $100.00 to 150.00-Brushes,rollers paint pans and extras
  • $10.oo to $15.00 per gallon mineral spirits or thinner for clean up.

Before you rush out the door to the local big box there is one more important cost to consider. Your Time. How much are you worth per hour to do this task. If its a labor of love then that is one value but if it is on the Big Boy (Girl) List of things that has to be done then how many Weekends can you spare? So after figuring out all the cost you may ask yourself what would it cost to have it done by a professional.
Lets take a look

Professional Staining Costs

There are maybe variables when trying to give you a pro cost for staining your house. Condition of the wood (prep time) grounds around the staining area that need to be protected. Height of the building. All these things have to be considered to get a honest and fair quote. The range I have seen would come in around $1.25 to $2.25 per sq. foot. The best way is to get on site quotes from local providers. You can find them here for free. Free Staining Quote


Clean up and enjoy

Which ever way you decide to go. DIY or hiring a Professional. The cost and time of restaining your wood siding is a great investment in the future of your home as well as the new pride it brings when you have friends and family over.

Pressure Washing Your Vinyl Siding

Power Wasing Vinyl SidingThe weather out side is nasty and winter still has us in its grasp, but now is a good time to think about spring and what all the snow and cold a and wind has done to your siding during the winter. Now is also a good time to look for sales on pressure washers since it is the off season. Here are a few easy to follow steps to help you clean you vinyl siding when you are ready.

Cleaning the vinyl siding of your home is a great way to keep your home looking beautiful and to keep the value of it high. Rather than needing to scrub every inch of your siding by hand, a pressure washer is a great tool to use. In order to do a thorough cleaning job and to ensure that you do not damage your siding, there are some steps you should take.

1. Choose the right pressure washer and amount of pressure.

There are a number of different types and sizes of pressure washers out there, so it can be difficult to decide which one is the best one for you to use. You can use either an electric or gasoline run pressure washer as long as it has at least a 3,000 PSI pressure rating with a rate of flow that is at least 4 gallons. This will give you both the pressure and amount of water you need to thoroughly clean your siding. You will want to add your cleaning solution to the reservoir and set the sprayer to low pressure. When you are looking for your new power washer (pressure washer) make sure to tell the sales folks that you intend to use this for siding washing. Have them explain the cleaning solution (soap) holder and how it works. Keep in mind that your new pressure washer will have many other uses then just cleaning your siding. Sidewalks, decks, gutters garage floors and even your car can all be cleaned with a power washer. Steel and wood siding can be cleaned as well but you will want to use caution because the washer will etch into the wood and remove the stain. siding can be Different nozzles have different uses. Each nozzle has  a different amount of pressure it releases as well as the spray pattern it produces. Here is a nozzle chart showing the different nozzles and there impact.

2. Prep the area you will be cleaning.

It will make the process of cleaning your siding go quicker and more smoothly when you prepare as much as you can before you start. Some of the things you should do are:

* Move any patio furniture, flower planters, or any other objects that may get in your way.
* Cover any plants you have outside to protect them from damage as well as to prevent them from getting any cleaning solution on them.
* Cover any electrical wiring or outlets you have outside.
* If you see any mold that is growing on your siding, you will want to remove this first with a bleach and water mixture.

3. Test the water pressure first.

Before you begin cleaning a large area, test the amount of pressure you are using on a small area. You can easily change the amount of pressure you are using to ensure your siding will be cleaned. Normally the soap application is done under low pressure then you switch to a higher nozzle (25 degree) and use that to wash off the soap and clean the siding.

4. Use a steady motion spraying back and forth.

To ensure that all areas are thoroughly cleaned, you will want to spray the siding from left to right in a steady motion. Keep the angle of the sprayer at about forty-five degrees to prevent water from getting behind your siding.

5. Rinse with clean water.

After you have washed your vinyl siding with soapy water, you will want to rinse it to avoid streaking. Ensure that you rinse it within just a few minutes of washing it so the cleaning solution does not have a chance to dry. I tend to start at the bottom and work my way up it seems to reduce streaking.


Proper Holiday Lighting Installation on Vinyl Siding

Gutter Clips

With the holidays quickly approaching, you may be in the mood to start putting up your outside Christmas decorations. Head outside on a relatively warm day and decide what type of decorations you’re going to be hanging this year. From Christmas lights to wreaths, bows and garland, there are so many different types of decorations to choose from. Show off your holiday spirit by installing lights and more on your homes vinyl siding. This approach works just as well on metal siding as it does for vinyl. If you are unsure of how to install Christmas lighting and decorations on your home, simply follow this guide to make your day a little bit easier.

Gutter Clips
One of the easiest ways to install Christmas lights on vinyl siding it to take advantage of gutter clips like in the picture above. These type of clips can be purchased at your local hardware store or retailer that specializes in Christmas decorations. Plastic gutter clips are easily able to snap onto your gutter without causing any damage to the siding of your home. To get started, you will first want to make sure that you have enough lights to string across your chosen space. Get your lights and other materials ready, including a ladder, at least two gutter clips for every foot of lights, an extension cord and pliers. Check to ensure that your lights are working before installing them.

Replacing Lights
Before installing your Christmas lighting on your vinyl siding, you will want to make sure that all bulbs are lit. If any bulbs are not working, simply use your needle nose pliers to pull the dead bulb out at the base and install a new bulb. If you do not have any extra bulbs, these can typically be purchased at your local hardware store during the holiday season.

Climbing and Hanging
After you have ensured that your lights are all in proper working condition and you have untangled the strings of lights, it’s time to climb up your ladder in a safe and sturdy spot to start installing your gutter clips along with lights. Place your gutter clips about every six inches along your siding. These clips easily snap on to your gutter, providing a hook to hang your lights from. Continue to move the ladder along the side of your home until you have installed all gutter clips. Next, repeat this process by moving your ladder along the side of your house while hanging the lights from the gutter clips that you have already put on. Connect your lights to an extension cord to bring them to a power source to complete the decoration process.

Decorations on the Siding We have just discussed the easiest way to hang lights.”Gutter Clips” Now what do you do if your plan includes hanging wreaths, lights or any other decoration that you can think of right on the siding. rule number one is try to avoid putting holes in the siding. Unlike wood siding where you can nail or screw right into it. Vinyl and Aluminum siding does not like holes. Water tends to find a way in behind and can damage the insulation or build up ice and push the siding out. So what are you supposed to do to hang that special decoration?  The same as you do with gutters there are clips designed just for siding. Just like we showed you with the gutter hooks you can get siding hooks at your local hardware store as well. Watch this Vinyl Siding Clip Installation Video for a sample of how they work. You can also consider using an adhesive stick on clip. I have found they do not hold as well in real cold weather. If you are doing aluminum siding you could check out magnetic clips for your projects.   Installing Christmas lights and decorations on siding is simple! Clips are available for a wide variety of lights including icicle lights and C6 bulbs.

How to Choose Between Vinyl, Steel and Aluminum Siding

Siding Options
Vinyl, Steel or Aluminum?

Vinyl siding may be the most popular type of siding currently used. It is affordable, looks good for years and has good durability. But aluminum siding is making a comeback, and steel siding has many good qualities to commend it. Here is a discussion of each type of siding that gives you the main reasons for considering each one.

Vinyl Siding Offers Lower Cost and Good Durability

Vinyl siding comes in several grades, usually distinguished by thickness and texture. The thinnest grades are less than .04” thick. They cost about $3 per square foot installed, and shouldn’t be expected to last more than 10-12 years depending on your climate. They’re a popular choice of homeowners giving their home a facelift before putting it on the market.

Better grades of vinyl siding can be as thick as .055”. They cost up to $5 per square foot installed but are far less likely to crack or be damaged by wind. Top grades also offer premium colors that are deeper and far less likely to fade.

Aluminum Siding Offers Heat Resistance and Better Durability

This type of siding originated in the 1930s as a durable, low-maintenance alternative to wood siding. It has been surpassed by vinyl in popularity, but the current generation of aluminum siding has a lot to offer. The paint is better, so the chalking and fading of early siding is no longer the issue it was.

As with vinyl siding, you’ll be better off choosing premium grades of aluminum. The siding will stand up to bumps better without denting and has tougher paint that is less likely to scratch. If you want slightly better durability to vinyl in a product that is also resistant to heat, this is a good choice. Aluminum siding costs range up to $7 per square foot installed.

Steel Siding Offers Excellent Protection and the Best Durability

The drawback to steel siding is that it may not be available in the same number of styles and colors as vinyl or aluminum. What it does provide is superior protection to weather events like high winds or hail. It is also very durable and should last up to 30 years. Like vinyl and aluminum, it is resistant to insects. Quality steel siding costs up to $7 per square foot installed.

Vinyl siding is the best material for short-term affordability, but steel gives you the best long-term value. Whichever type you choose, make sure you hire a qualified siding contractorwith good experience to handle the installation. The quality of the installation has much to do with the performance and durability the siding will give you in the years ahead.

Which Type of Siding Has the Highest Efficiency Factor?

Siding energy efficiencyHomeowners today are concerned about energy efficiency in their homes for a couple of reasons. First, with the high cost of energy, keeping utility bills under control requires using energy-efficient materials. Secondly, many are also looking for eco-friendly products that reduce their home’s impact on the environment.
Which type of siding does the most to make your home energy efficient?  The top choices are insulated steel, vinyl or aluminum siding. Here’s a look at your options when it comes to energy efficiency and home siding.

Efficiency Levels of Common Siding Materials

The truth is, no standard siding material offers very good efficiency. The energy efficiency for building materials is known as R-value. The higher the R-value, the more efficient the building material is. Most energy experts suggest that your home’s walls should have at least an R-13 energy efficiency. In fact, that is code in many areas. An R-15 or R-18 can be achieved by using 2×6 construction instead of 2×4 construction.
Most siding materials have an R-value of less than 1! That includes standard vinyl, steel or aluminum siding without added foam insulation. Here’s a brief list of siding materials and their R-values.
Beveled wood siding: 0.81
Standard aluminum, steel or vinyl siding: 0.61
Brick or Stone: 0.44
2-inch stucco: 0.4
Fiber cement: 0.37
1-inch brick or stone veneer: 0.11
As you can see, none of these is going to make a significant difference by itself in lowering your energy use or your energy costs.

The R-Value of Insulated Vinyl, Steel and Aluminum Siding

When you choose one of these siding products backed with quality foam insulation, you will increase the R-value of the siding to 3.0-4.0. That’s a remarkable improvement, and that will make a tangible difference in how much energy is saved in your home.

Is Energy Efficiency a Cost-Effective Choice for You?

If you are building a home, the extra cost of insulated siding will be better spent on upgrading from 2×4 construction to 2×6 construction in the walls or by choosing a better insulation product. If you are re-siding an existing home, then adding insulated siding is your most cost-effective choice for making your home an energy-miser.

More Energy Saving Tips for your Home

These tips for a green home will also lower your utility bills. Get a programmable thermostat and use it to turn down the heating/cooling system when no one is home or when everyone is sleeping. Add insulation to the attic and weatherstripping to doors and windows. Properly vent your attic, especially in warm climates. And when it is in the budget, replace those windows and doors with Energy Star rated products that will make your home more energy-efficient in all seasons.

5 Reasons Vinyl Siding is the Best Choice for All Homes

Vinyl siding remains the most popular form of siding by far. Here are the reasons that vinyl siding is the best choice for any home.

1. Vinyl Siding is Affordable

Homeowners want cost-effective ways to improve the look of their home while protecting it from the elements. Average prices for vinyl siding are well below prices for wood siding, aluminum siding, stone or brick siding or veneer. It is the most affordable type of siding on the market.

2. Vinyl Siding Offers Many Attractive Options

You’ll find a full spectrum of vinyl siding colors when you shop for it. Many are light and bright while others are richer and deeper. For texture, most vinyl siding has a heavy grain pattern that looks very much like painted cedar. Newer siding products offer the look of classic smoothed wood that was popular used in 19th century and early 20th century structures. It’s a great choice for any home.

3. Vinyl Siding is Durable in All Climates

No matter where you live, vinyl siding will hold up very well to the sun, wind, rain and snow. Made from tough polyvinyl chloride, or PVC, it is flexible enough not to be brittle but strong enough to hold together in a storm. It resists damage from hail very well too and is protected against fading.

4. Vinyl Works with Any Style of Home

With today’s fantastic choices, including the trim and accessory pieces available, vinyl siding is an attractive accompaniment to any style of home. It works well on upscale homes, sometimes in conjunction with brick or stone. Vinyl siding looks just as good on a starter bungalow. It works well with everything in between. No matter what style of house you have, classic, traditional, contemporary or rustic, there are vinyl siding colors, textures and accessories that will significantly improve the appearance of your home.

5. Vinyl Siding Offers a Good Return on Investment

If you decide to sell your home, recently-installed vinyl siding will improve your home’s value and increase the likelihood of it attracting attention. If your home has outdated or worn siding, new vinyl siding will boost its curb appeal tremendously.
From an expense standpoint, vinyl siding costs are much lower than prices for wood, brick, stone, fiber cement board and other options. It will cost you less to make your home more appealing to potential buyers when you choose high-quality, affordable and attractive vinyl siding.
These are the top 5 reasons vinyl siding is the right choice for any home. Take a look at today’s vinyl siding options. You’ll love what you see!

When is the Best Time of Year to Replace the Siding on your Home?

Fall is a the best time to replace the siding on your home for several reasons. Here is why:

1. Prices are Lower in the Fall

Most homeowners get quotes for having their siding replaced in spring and summer. That means that siding contractors are busier in those seasons. Many have as much or more work than they want. Under those circumstances, they write the highest estimates of the year for any new work.
In the fall, the business starts to slack off and they get a little more “hungry.” In cold climates, they want to keep their crew working a little longer before shutting down for the year. You’ll find lower siding price quotes for installation in the fall, especially when you get at least 3 written estimates from contractor who know they are competing for your business.
More good news about prices is that the material is often put on sale in late summer or early fall. Building supply companies want to move out old inventory to make room for winter products they sell or for the next year’s new styles. You might even find clearance deals on very nice siding you’ll love.

2. Summer Heat can Affect Siding Installation

Vinyl siding expands in the heat of summer. If it is installed in hot weather and nailed too tight, it might buckle or crack when it contracts in the cold weather of winter. The mid-range temperatures of fall are ideal for siding vinyl siding installation, and this principle applies to wood siding too.

3. Your Home will be Ready for Winter

Gaps in old siding or the lack of house wrap on your home can raise your utility bills this winter. If you have new siding installed this fall, a competent siding crew will caulk gaps in the construction before putting on the new siding. If your home doesn’t have house wrap, this is an ideal opportunity to put it on before it is covered up by the new siding.

Siding Replacement in Warm Climates Vs. Cold Climates

If you live where winters are mild, then for you, best time of year to replace your siding will be late fall or early winter. In colder climates, you want your siding, especially vinyl siding, installed before freezing weather hits when siding gets slightly brittle and can crack during installation. In cold climates, the period from Labor day to mid-October is ideal.

5 Ways to Pay for Replacement Siding on your Home

When your home needs new siding, you’ve got to find a way to pay for it. Here are the 5 most common ways that homeowners choose to pay for replacement siding.

1. Pay Cash

Paying cash rather than taking on new debt is a very sound financial practice. If you’ve got the cash on hand or can liquidate some assets to pay for it without taking a tax hit, then this is a great way to cover the cost of your replacement siding.

2. Use a Home Equity Line of Credit

This is essentially a home equity loan. Rather than borrowing a lump sum, your lender gives you a line of credit up to a certain limit. You can draw out what you need to pay for your replacement siding. You’ve got to have the equity in your home and qualify for the loan, of course. If you like your current mortgage (or don’t have one), a HELOC is a great way to go.

3. Refinancing a Mortgage

If you’ve been thinking about refinancing to get a lower interest rate, you can simply include the cost of the replacement siding in the new mortgage if the equity is there. If you are able to substantially lower your interest payment, you might just find that the interest you save over the next 15-30 years will more than pay for the cost of the siding. You can probably throw in a hot tub or a trip to Hawaii too!

4. Personal Line of Credit

This is an unsecured loan from your bank. To qualify, you’ll have to have a very good credit score and a longstanding relationship with the bank. Depending on the total replacement siding cost, you might also need to verify your income at a certain level to qualify. This is an option for homeowners who don’t have enough equity in their home or cash in their pocket.

5.  Put the Replacement Cost in the Budget and Save for It

If you don’t have the cash on hand now, consider putting off the home renovation project for a few years and diligently save for it. Siding replacement is rarely an urgent expense.
Having a goal often inspires the kind of cost-cutting in our day to day lives that reduces wasteful and impulse spending. When you commit to a financial goal and have a decent income, it’s amazing how fast the money can accumulate!

Conclusion

Which of these ways to pay for replacement siding for your home is right for you will depend on your complete financial picture. Consider your debts, assets and income and the right one should become quite clear. When you are ready to get a quote from a trusted siding installer.