Compare Cleaning Costs and Methods for the Exterior on Your Home

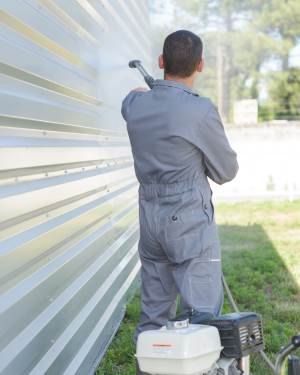
exterior house cleaning with pressure washerLet’s talk about cleaning cost and techniques for today’s top siding products:

Pressure Washing: The Basic Siding Cleaning Method

Siding cleaning methods are more alike than different. A pressure washer can be used on all types of siding. What differs is the precautions that need to be taken for each material.

Cleaning siding with a pressure washer has three steps:

  1. Using gentle pressure, the siding is sprayed with a mild detergent and water solution that is given at least 10 minutes to loosen dirt
  2. Areas of heavy soil such as mold and algae are gently scrubbed with a brush with soft bristles
  3. The siding is rinsed from the bottom to the top and quickly down again with the pressure washer set to a pressure level appropriate for the material being cleaned

The detergent solution should not be allowed to dry before it is rinsed, so only one side of the home should be wet before rinsing. Since direct sunlight will quickly dry the cleaning solution, the workflow should be arranged to avoid it. When this isn’t possible, a sunny side of the house should be cleaned in sections 15-30 feet wide to prevent drying.

General Tips for Pressure Washing Preparation

As the name implies, significant water pressure is used in the process. Prepare your home for pressure washing with these tips that apply to all types of siding:

  • Remove all non-permanent decorations, like Christmas or holiday decorations.
  • Inspect and replace loose or missing caulk around windows, doors, vents and other openings at least one week before cleaning to allow the caulk to cure
  • If you have wood or cedar siding, make sure you seal all holes and cracks to prevent water leaking into walls.
  • Clean then repair loose gutters and downspouts to keep them from coming apart during cleaning and damaging the siding
  • Cover outlets with duct tape that don’t have weather covers on them
  • Optionally, cover light fixtures with a plastic bag, and tie or tape the bag closed to keep it secure
  • If your home’s foundation leaks, have it repaired prior to cleaning
  • Close and lock all windows during cleaning to create the tightest seal

Tips for Cleaning Each Siding Type

These siding cleaning tips apply to specific siding materials.

Vinyl and aluminum siding cleaning: Horizontal siding should be pressure washed side to side; vertical siding such as board & batten siding should be washed up and down. For either, the essential precaution is not to force water into the seams of the siding where it can cause mold or warp the home’s sheathing.

Brick, brick veneer, stone and slate: Inspect and replace missing or loose mortar around brick or stone at least a week prior to cleaning to give the mortar time to cure. Also, make sure weep holes aren’t clogged, so that any water that gets behind veneer will be able to drain properly rather than becoming trapped against the home’s sheathing where it will cause mold and warping.

All wood siding: Check and repair wood siding, shingles and shakes for missing or damaged material, and replace it before the siding is cleaned. Replace cracked sections or repair the crack with quality wood filler and allow it to dry. Never use a brush with stiff or wire bristles on wood. If you have any concerns, use the minimum pressure, typically 1,200 to 1,500 PSI, needed to remove the detergent solution or rinse with a garden hose. If you have reason to believe your wood siding is fragile, do not pressure wash it. Instead, use a soft brush to wash it with a mild soap solution, and rinse it with the garden hose with the sprayer you use to water the garden or wash your car.

Painted wood siding: The US outlawed lead paint in 1978. If you suspect that your wood siding predates 1978, it might have layers of lead paint below the surface. Use minimal pressure to remove only the loose, top layer of paint. If several layers of paint are flaking off, contact professionals for advice and cleaning.
Exterior Home Maintenance for Fall Season

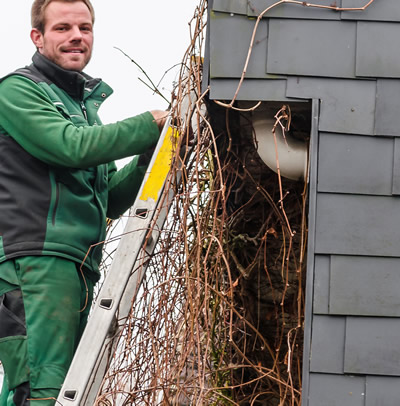
man-on-ladderWhen there’s a slight chill in the air and leaves begin to fall, this is a reminder to home owners that winter is just around the corner. Fall is the best time to create a checklist for exterior home maintenance. Creating a checklist shouldn’t be hurried or important details might be skipped.

For a little help getting started, begin with the top “must do” tasks.These will get the most important fall home maintenance tasks out of the way, and you’ll likely spot a few other areas that need work as you go along.

Fall Home Maintenance includes:

  • A thorough inspection of the exterior roofing, gutters and siding
  • Checking for possible gaps around window and door frames
  • Cleaning debris from gutters
  • Sealing around the bases of chimneys and other exhaust outlets
  • Checking downspouts for buildup of debris
  • Pressure washing of exterior siding
  • Checking the condition of exterior paint
  • Replacing wood fascia that shows signs of fissure cracks or rot
  • Inspect foundation for cracks or soil erosion
  • Pressure wash decks
  • Secure loose exterior siding

“Must Do” Task No. 1 – A Thorough Inspection
In order to evaluate the amount of preparation for winter needed, the first task for homeowners is a comprehensive assessment of the condition of the home and structure. The simplest way to do this is to create an inspection checklist that covers the condition of foundation, exterior siding, gutters and downspouts, wood fascia, doors and windows, chimneys and exhaust outlets. In older homes, note whether tasks require repair or replacement.

Task No. 2 – Preventing Loss of Home Heating
Energy costs can be prohibitive during severely cold winters. To prevent loss of home heating, it’s necessary to check for exterior gaps around door and window frames. These often occur due to normal weathering. However, left unnoticed, they can increase the cost of energy.

Task No. 3 – Cleaning Debris from Gutters
When gutters become clogged with debris like fallen leaves or bits of dust, wet fall weather may cause the gutters to collect water. When this happens, elevated levels of water in gutters tend to seep under the eaves of the roof and cause interior damage. Even with today’s new gutter caps, a certain amount of trace dust can build up, depending on the severity of wind and ice.

Task No. 4 – Seal around the Base of Chimneys and Exhaust Outlets
Another way that energy may be lost is when the sealant around chimneys and exhaust outlets becomes worn, reducing the integrity of roofing materials. Special sealants can be applied to restore around the base of a chimney or exhaust outlet.

Task No. 5 – Checking Downspouts for Buildup of Debris
After cleaning gutters, downspouts attached to gutters should also be inspected for a collection of debris. Very often, downspouts collect debris that doesn’t always pass to the bottom outlet. Use a pressure washer to push out any collected debris in downspouts.

Task No. 6 – Pressure Wash Exterior Siding
Though it may go unnoticed in the heat and humidity of summer, exterior siding does show signs of residue buildup. This is especially true if there are foundation plants and shrubs or large trees in proximity to the house. Green residue builds up and makes the exterior siding appear unsightly. Pressure wash exterior siding to keep it looking fresh and vibrant.

Task No. 7 – Check Condition of Exterior Paint
For homes with cedar, wood or fiberboard siding, the task at hand is to check the condition of painted surfaces for chips and peeling. A new coat of paint may be needed or a sealant should be applied where applicable.

Task No. 8 – Replace Rotted Wood Fascia
One of the most overlooked tasks for fall is to inspect the wood fascia to which gutters are attached. Weather often plays havoc with this wood and the weight of gutters attached make the load on the wood doubly comprised. Wood fascia may show signs of fissure cracks or rot above or below the gutter line. Before the situation worsens, replace the wood fascia to avoid gutters detaching under the weight of heavy ice and snow.

Task No. 9 – Inspect Foundation for Cracks or Soil Erosion
To properly maintain the exterior of a home during the fall season, it’s important to inspect the foundation of the home up to the level where siding ends and foundation begins. Soil, especially in certain types of sandy soil, tends to shift slightly with each year. Foundation cracks may begin as tiny spider-like veins. As soil continues to shift, however, those tiny cracks can open wider and become a major problem. Check every fall for these and use a special cement sealant, applied with a single blade trowel.

Task No. 10 – Pressure Wash Decks
After a thorough inspection and maintenance of the exterior of the home is completed, there’s just another task that shouldn’t be overlooked: the outdoor deck. Start by inspecting around the base of the deck. Look for unusually worn wood or other signs of deterioration. Sand smooth any rough spots on the deck and deck stairs. Apply a weatherproof sealant for added protection.

Task No. 11 – Secure Loose Siding
If siding doesn’t require painting or pressure washing, check for areas that appear to have loose shingles or shakes. Should a serious late autumn or early wind storm occur, loose siding can detach and be damaged.

With just a little pre-planning and a few minor repairs and replacements, homeowners can feel cozy and warm throughout the long, cold days of winter.